Starting Herbs From Seed Indoors: A Step-by-Step Guide
Follow six clear steps to sow herb seed indoors: moisten the mix, sow at the right depth, cover, give light as soon as sprouts show, water gently and thin to the strongest seedlings.
At a glance
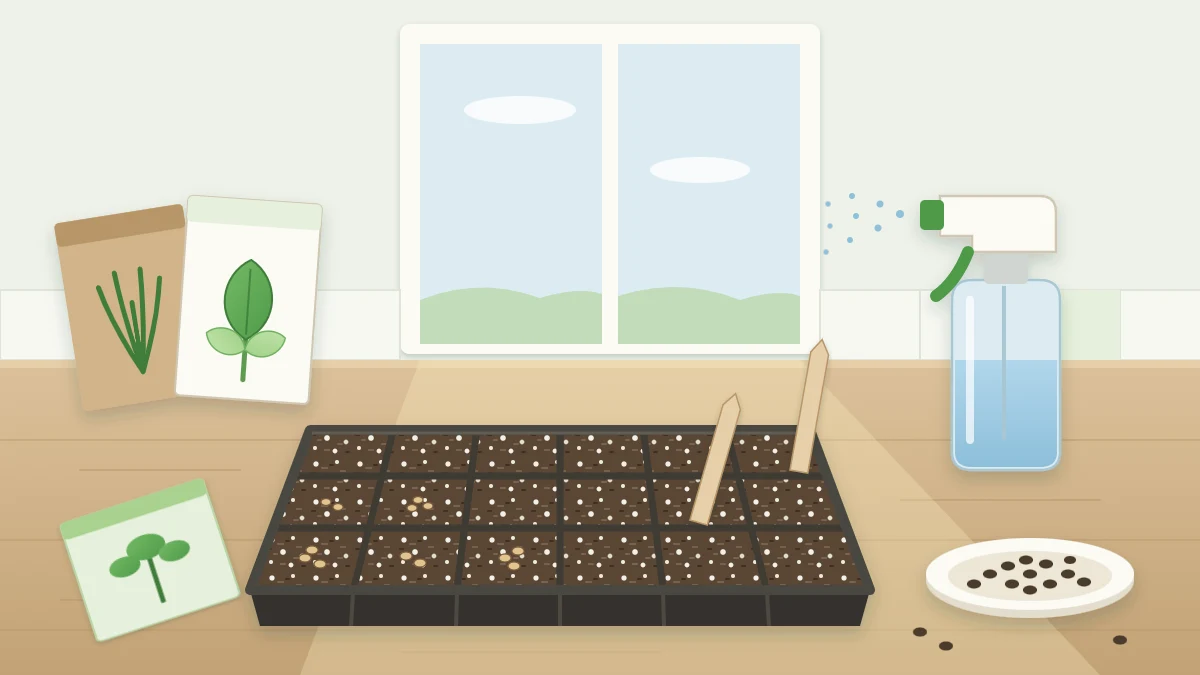
What you need
- Cell tray or small pots with drainage holes
- Seed-starting mix
- Herb seed packets
- Clear lid or clear wrap
- Labels and a pencil
- Fine sprayer or watering tray
- Small scissors
A packet of seed costs little and holds far more plants than you will need, which makes sowing your own a relaxed way to learn. The method is the same for most culinary herbs, with a few adjustments for seed size and for how warm each herb likes to be.
This step-by-step guide to starting herbs from seed indoors takes you from an empty tray to a set of sturdy young seedlings. Read your seed packets first, though. They give the depth, spacing and conditions for that exact variety, and where a packet and a general guide disagree, the packet wins.
What you need
- Containers with drainage. Cell trays or small pots both work, as long as each has a drainage hole. Set them in a tray or on saucers to catch the water.
- Fresh seed-starting mix. It is fine-textured, so small seeds make good contact with it and tender roots push through easily. Avoid garden soil and old mix from other pots.
- A clear cover. A domed lid or a piece of clear wrap holds moisture in until the seeds sprout.
- Labels and a pencil. Many herb seedlings look alike at first.
- A fine sprayer or a tray for bottom watering.
- Bright light ready for the day the first sprout appears.
Good to know
Not every herb is worth sowing. Mint does not come reliably from seed, so start it from a plant, a division or a cutting. Rosemary seed is slow and germinates poorly; a nursery plant or cutting is the practical route.
Step 1: Moisten the mix and fill the containers
Dry seed-starting mix sheds water, so wet it before it goes into the cells. Tip some into a bowl, add water a little at a time and stir until it feels like a wrung-out sponge: evenly damp, holding together when squeezed, but not dripping.
Fill each cell to just below the rim and firm it lightly with your fingertips. Do not pack it down hard. A level surface helps you sow at an even depth.
Step 2: Sow at the right depth
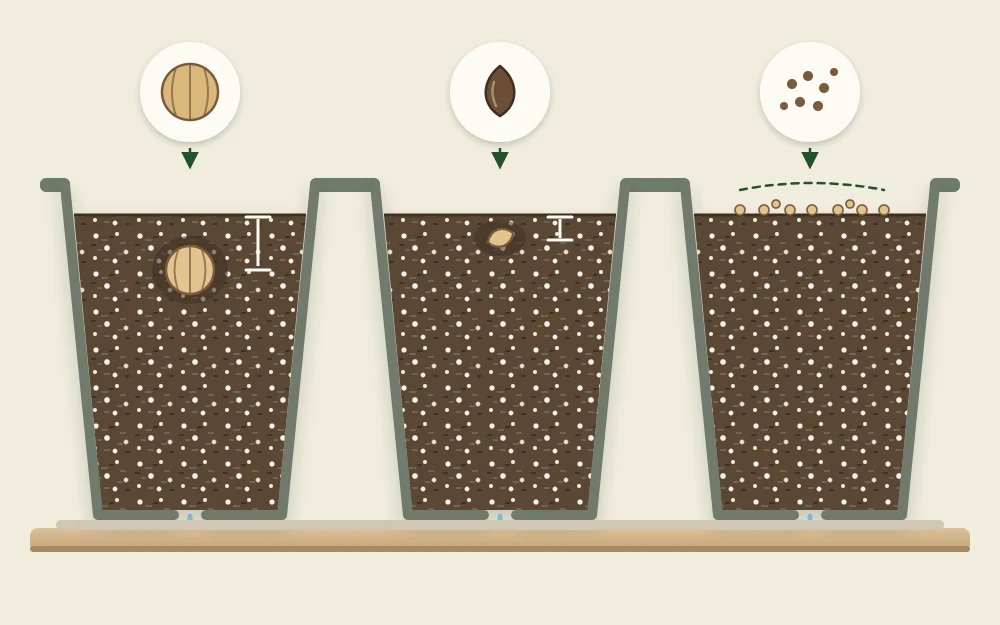
Depth is where the seed packet matters most, so follow it. As a rough guide when a packet is unclear, larger seeds are covered with mix to about twice their own thickness, while tiny seeds are pressed onto the surface and barely covered or left uncovered.
- For larger seeds such as cilantro, make a shallow dent, drop the seed in and cover it lightly.
- For medium seeds such as basil, chives and parsley, set them on the mix and sift a thin layer over the top.
- For tiny seeds such as thyme and oregano, sprinkle a pinch on the surface and press gently so they touch the damp mix. Do not bury them.
- Sow a few seeds in each cell. Not every seed sprouts, and you will thin the extras later.
- Label each cell or row with the herb and the date right away.
Step 3: Cover and keep warm
Place the clear lid or wrap over the containers. It traps moisture so the surface does not dry out while the seeds are taking up water. Put the tray somewhere bright but out of direct sun, which can overheat the air under a cover.
Warmth helps germination, but herbs do not all want the same amount. Basil likes it warmest and is slow or patchy in a chilly room. Cilantro and parsley sprout in cooler conditions and do not need extra heat. If you sow several herbs at once, grouping the warmth lovers in one tray and the cool-season herbs in another lets you place each where it suits.
Now comes the waiting. Some herbs appear within days and others take weeks, and this guide leaves the timings to the reference on how long each herb seed takes to germinate. Check the tray daily all the same.
Step 4: Uncover and give light at once
As soon as you see the first sprouts, take the cover off. Seedlings left under a lid in still, damp air are prone to collapse at the base. In a tray of mixed herbs, uncover when the first cells sprout and keep the slower ones moist by hand.
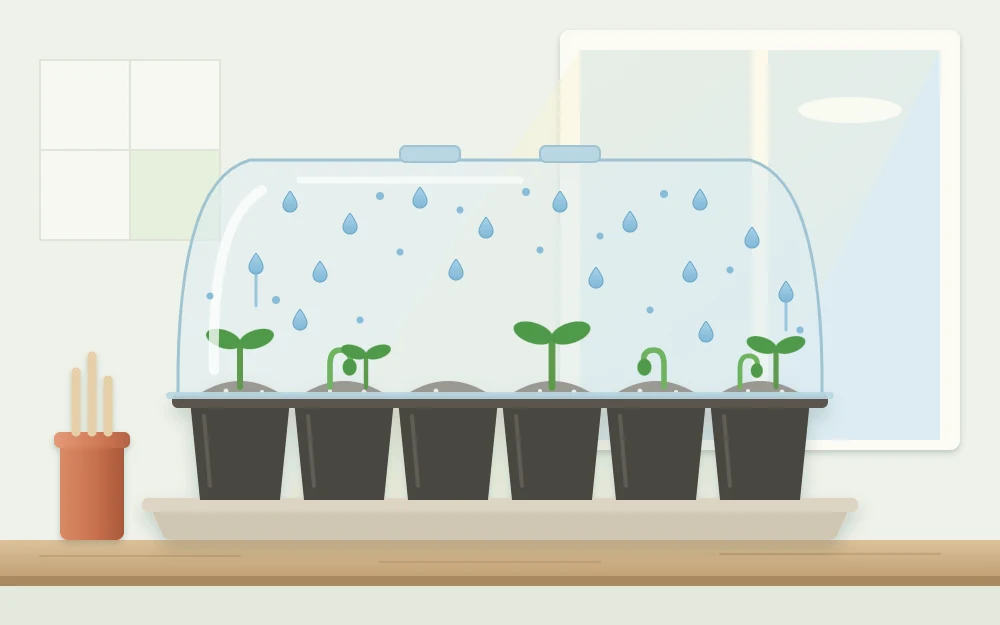
From this moment the seedlings need strong light. Move them to your brightest window, or set a lamp close above them. Without enough light they stretch within days, becoming tall, thin and leggy, and stretched seedlings rarely turn into sturdy plants. For how close to place a lamp and how long to run it, see the guide to grow lights for herbs.
On a windowsill, turn the tray regularly so the seedlings do not lean one way.
Step 5: Water gently
Keep the mix moist, not soaked. A heavy pour flattens seedlings and washes tiny seeds away, so use one of two gentle methods:
- From below: pour a little water into the tray under the cells, let the mix draw it up until the surface darkens, then tip out what is left.
- From above: use a fine spray until the surface is evenly damp.
Let the surface begin to lose its dark, wet look before you water again. Small cells can dry quickly in a warm bright spot and stay wet for much longer in a cool dim one, so check by touch and by the weight of the tray.
Step 6: Thin to the strongest seedlings
The first leaves to open are the seed leaves, which are usually simple in shape. The true leaves follow and look like the herb itself. Once seedlings are standing well, thin each cell so the plants left have room.
Snip the extras at the surface with small scissors; do not pull them, which can disturb the roots of the seedling you want to keep. Keep the sturdiest in each cell. Chives and basil are happy left as a small cluster.
Tip
Cilantro, parsley and dill grow a taproot and dislike being moved. Sow them in the pot where they will stay, or in deep cells, and disturb the roots as little as you can.
What comes next
When seedlings have their first true leaves and roots that hold the mix together, they are ready for larger pots of regular potting mix. The guide to transplanting herb seedlings shows how to move them without damage. For more background on sowing indoors, see University of Maryland Extension’s page on starting seeds indoors.
Frequently asked questions
How deep should I plant herb seeds?
Follow the seed packet first. As a rough guide, larger seeds are covered with mix to about twice their own thickness, while tiny seeds such as thyme and oregano are pressed onto the surface and barely covered or left uncovered. Burying very small seed too deeply is a common reason nothing comes up.
When should I take the cover off my seed tray?
Remove it as soon as the first sprouts show. The cover is only there to hold moisture while seeds germinate, and seedlings kept under it in still, damp air are prone to collapse. After that, keep any slower cells moist by hand and give the whole tray strong light straight away.
Why do herb seedlings grow tall and thin?
Stretched, leggy seedlings are most often short of light, though too much warmth and crowding can add to it. Move the tray to your brightest window or set a lamp close above the seedlings, turn the tray regularly, and thin crowded cells so each plant has room and light.